Adding a countdown timer is a is a proven tactic to increase your sales and to make urgency for your visitors to take action.
The good news, it is now really easy to create your countdown timers even without writing a single line of code!
Yes, you heard it correct!
In this guide, we will show you how to create a floating bar with a countdown timers on your WordPress website using a tool called OptinMonster. You can use this tool for any other CMS or even for the custom built websites as well.
Let’s dive into the 5 simple steps to create stunning countdown timers popup on your website to boost conversion rate of your website or blog.
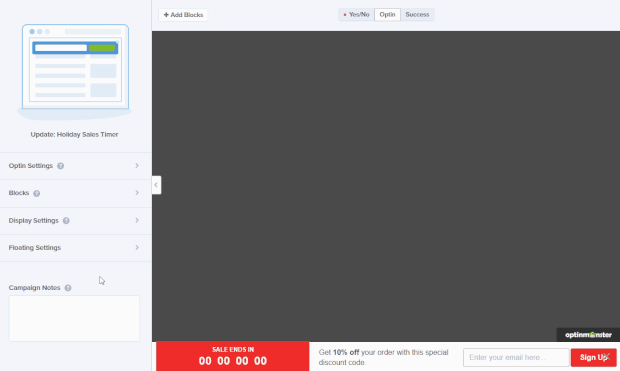
Step 1: Create a Floating Bar Optin
First, signup and login to your OptinMonster dashboard, and create a new popup by clicking on the green ‘Create New Campaign’ button.
Next, select the Floating Bar widget campaign type.

Now, select the count down timer template by hovering over it and click on the blue Use Template button.

PRO Tip: We’re using floating widget for illustration purpose only. You can literally add countdown timer on in almost any popup widget.
Then, on the next screen, name your campaign and choose the website/ domain you need to add the popup widget.
Click ‘Start Building’ button once done to enter the campaign builder.

PRO TIP: It is recommended to save your hard work frequently while working on the campaign builder. Who known when things will go wrong?

Step 2: Update the Display Settings
The default position of the floating bar widget will at the bottom of the screen. To move it towards the top of the screen, toggle Load Floating Bar at Top of Page to the On position under Display settings menu.
You can remove the Powered By OptinMonster branding as well by toggling branding to off.
Step 3: Set the End Date/Time
Simply click on the counter timer inside the floating widget demo on the live preview of your editor to edit it’s configurations.
Make sure the Type is set to Static so that all the visitors will see the exact same timer when they arrive your website.

Now, you can update the start and end date and time of the timer.

Step 3: Customize the Copy & Design
Awesome! You’ve the basic setup ready for your floating widget, and now it’s time to customize the look and feel and to add compelling copy to make it move beautiful and conversion friendly.
You can simply click on the gear icon of each of the sections and elements to see respective editing options.

You customize the widgets as you wish, and you can also add custom CSS to extent your design further if wish to do.

One the popup design is ready, you can customize the thank you screen of the popup by editing the success screen.

On this screen, change the success message and coupon code as you wish.
Step 4: Connect an Email Service Provider
In order to collect the email optins correctly, OptinMonster recommends to connect their optin with your email autoresponder service provider.
OptinMonster integrates with almost all of the email services providers. But our personal recommendation is ActiveCampaign.
To connect ActiveCampaign with your popup, Go to the Integrations tab.

Click ‘Add New Integration’ and choose ActiveCampaign’ form the dropdown list.
Once you click ‘Register with ActiveCampaign’ a new window will come which will asks for your ActiveCampaign credentials to authenticate.
Once logged in, provide necessary permissions.
Now you can easily choose the ActiveCampaign email list for new popup campaign.
Step 5: Set the Display Rules
Awesome! Now you have the popup ready to rock and all, and the next step is to set the display rules for the same.
Go to Display Rules tab, and set your floating bar on or off before a certain date.

Next, we need to let OptinMonster know on which pages we need to see the floating bar. You can choose to show the floating bar on all pages as well.

Kudos! Don’t forget to save your work!
Step 5: Publish Your Countdown Popup
Yaay! Your popup is now ready to launch on your website. Here’s how to make it LIVE on your domain name.
Go to Publish tab and toggle the status to Live, then save the campaign.

If you’re running on WordPress, it is super easy to publish the widget using OptinMonster’s own plugin.
Once you have the plugin installed, go to OptinMonster tab on your dashboard and you should see a list of available campaigns.
Click on Go Live nearby each of the campaigns to make it LIVE on your website.
How cool it is!
Not on WordPress?
If you’re not using WordPress, you can embed your campaign byu choosing your platform under the Publish tag and simply follow the instructions on the screen for each of the platforms.

If you’ve any questions, please feel free to let us know as comments below.
Leave a Reply