• Skip to primary navigation
  • Skip to main content
  • Skip to primary sidebar

Technology blog

Technology Blog

  • Tech Updates
  • SEO
  • Reviews
  • Google
  • Blogging
  • Windows
  • Downloads
  • Earn-Money Online
  • Android

Technology Blog

How to Create Surveys In WordPress?

November 3, 2020 by Technology Blog Leave a Comment

Are you looking for how to create beautiful surveys in WordPress? Surveys and Polls help you to collect real data from people to make important decisions.

Why Choose WordPress Plugins for Surveys?

There are many tools available on the internet to create surveys and polls like SurveyMonkey and TypeForms.

However, the downside of such tools is that your surveys and results are stored on third-party servers with very limited customization options and also they have high monthly recurring fee to use their services.

Unlike those tools, WordPress plugins like WPForms helps you to create beautiful and highly customizable forms,m surveys and polls at very affordable price. Oh, there are FREE plugins with limited features as well.

Read comparison of most popular WordPress forms builders here.

Creating a Survey in WordPress

In this article, we’ll be using using one of the most popular WordPress form builder plugin WPForms to create a new survey form.

Please note that the Survery and Polls addon is part of WPForms PRO plan.

Now, let’s see how to create a new survey using WPForms.

The first thing you need to do is install and activate WPForms plugin on your WordPress plugin.

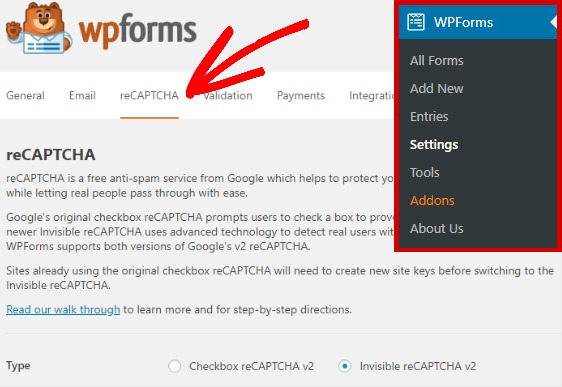
Once the plugin is installed, go to WordPress dashboard -> WPForms -> Settings page to enter your activation code you received from WPForms.

Next, visit WPForms >> Addons page and sroll down to surveys and polls addon. Go ahead and click on the ‘Install Addon’ button. Once the installed, you can click on Activation button.

Awesome! Now your WordPress is ready to create beautiful survey forms without writing a simple line code.

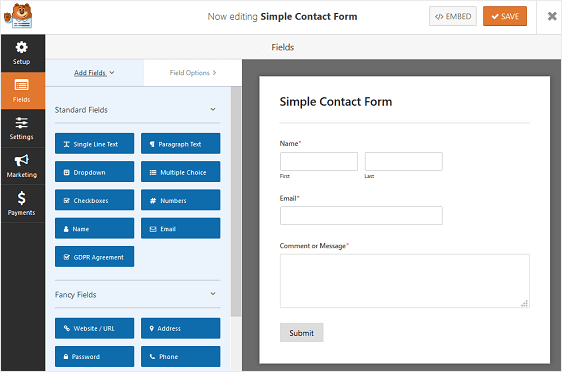
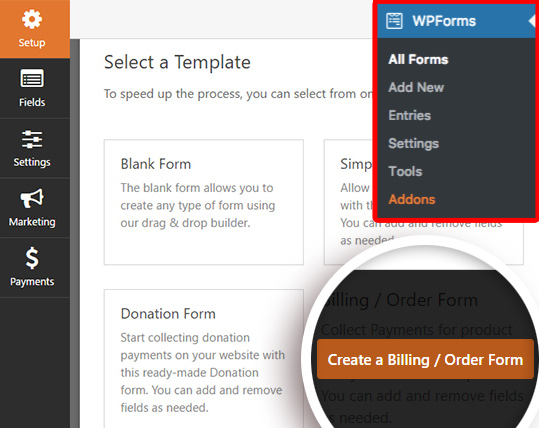
Now, visit WPForms >> Add New page to create a new form. WPForms drag-and-drop form builder will be launched.

Alright! Now, let’s name your new form. In this example, we’re calling it ‘My First Survey Form’, and then choose one of the templates to get started.

You can simply click on any field to update it or delete it or you can add new fields by dragging from the left side to the form builder canvas.

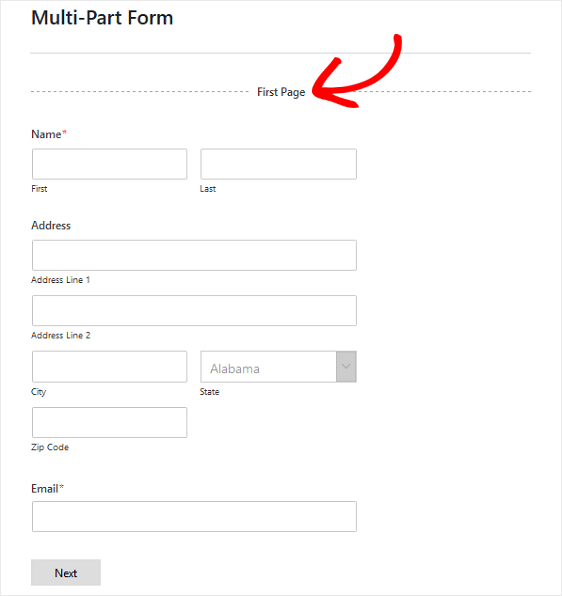
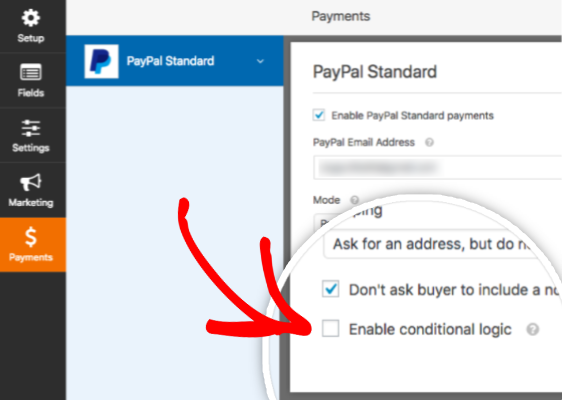
WPForms includes conditional logic as well to make your forms interactive and make it personalized based on previous inputs.

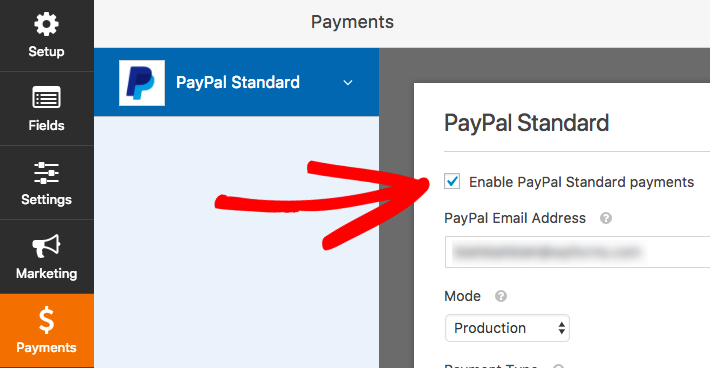
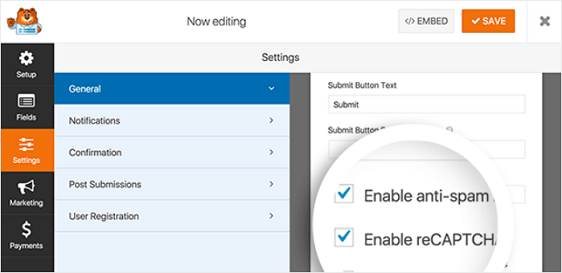
Once your forms is ready looking at the settings and make necessary updates and then close the form.

Adding the Survey Form in Your WordPress Website

WPForms helps you to add forms anywhere on your WordPress website including posts, pages, custom post types or your sidebar. you name it!

To add the form, just open the page, post, custom post type or sidebar and then click on ‘Add Form‘ button.

This will bring up a popup where you can choose the survey you would like to add on your WordPress form. You will now see the form shortcode added into the post editor.

Once done, just publish the post. You can see the form LIVE on your website page.

Viewing Your Survey Form Results

WPForms shows survey results in beautiful graphs and charts. You can also export the graphs to print or to show on your presentations or spreadsheets.

To view your survey results, go to WPForms >> All Forms and then click on ‘Survey Results‘ link below your survey form.

On the results page, you can see your survey form responses in different formats. You can export the responses as per your requirements.

Convert Any WPForm into a Survey

WPForms also provides you the feature to convert any of your existing forms in to a survey and to display past form responses as survey results.

To do so, simply go to the edit page of the survey and then go to Settings >> Surveys and Polls section. Now check the box next to ‘Enable Survey Reporting‘ option and save your changes.

Filed Under: Uncategorized

3 Best WordPress Survey Plugins Compared [2025]

November 3, 2020 by Technology Blog Leave a Comment

Looking to add surveys to your WordPress site? Whether you’re running a blog, business website, or online community, surveys are a great way to collect feedback, understand your audience, and make data-driven decisions.

In this article, we’ll compare the best WordPress survey plugins available today — highlighting their key features, strengths, and limitations so you can choose the right one for your needs.

What makes a WordPress survey plugin great?

A strong survey plugin should let you:

  • Create interactive, user-friendly forms with minimal effort.
  • Generate detailed reports (graphs, charts, exports) for analysis.
  • Optionally display results publicly on your site.
  • Integrate with CRMs, spreadsheets, or cloud storage for better data handling.
  • Provide data security when handling file uploads or sensitive responses.

Now, let’s dive into the top plugins.

WPForms – Best All-in-One Form & Survey Plugin

WPForms stands out as the most powerful and user-friendly WordPress form builder on the market. With its Surveys & Polls Addon, it brings enterprise-level functionality similar to SurveyMonkey and Typeform — but directly inside WordPress.

Key Features

  • AI Integration: WPForms now includes an AI-powered form builder. Simply describe the form you want in plain text (e.g., “Create a customer satisfaction survey”), and WPForms generates it instantly — complete with fields, labels, and logic.
  • Advanced Survey Capabilities: Build surveys with Likert scales, star ratings, and Net Promoter Score (NPS). Results are displayed with interactive graphs and charts that can be exported or embedded via shortcode.
  • Cloud Storage Options: With the Google Drive addon, survey responses and file uploads can be stored directly in your Drive — keeping your WordPress site lighter and your data more accessible.
  • Security Enhancements: Restrict file upload types and sizes, protect uploaded files with access controls, and even remove sensitive uploads from email notifications for better data security.
  • Other Features: Conditional logic, multi-step forms, email marketing integrations, and instant notifications.

👉 In short: If you need versatile, secure, and professional-grade surveys alongside regular form-building features, WPForms is the top choice.

Gravity Forms

Gravity forms is one of the oldest forms builders of WordPress with a lot of addons including surveys and polls. It’s easy to use, simple and create forms using common form fields.

However, Gravity Forms survey responses can only be shown on WordPress dashboard for admins, and can not export graphs or charts and can’t show publicly on WordPress pages. But you can manually export the responses and how on WordPress pages using tables.

WP-Polls

If you’re planning to create very simple survey forms, then WP-Polls is an easy FREE option.

Unlike other form builders in this article, WPPolls doesn’t have a form builder or interactive questions answers options. You can collect responses from visitors using radio buttons or checkboxes.

Once the survey is completed, users are automatically redirected to the survey result. The results will be saves on the WordPress dashboard as well.

Formidable Forms

Formidable Forms is another advanced WordPress form builder with surveys and polls addons.

The best part of Formidable Forms ois that it let you create other advanced form types such as quizzes, calculators, and more.

Filed Under: Uncategorized

How to Quickly Create Exit Popups for WooCommerce

September 26, 2020 by Technology Blog Leave a Comment

Are you running an eCommerce store on WooCommerce powered by WordPress?

If yes, we’ve exciting magic recipe for you which helps you to increase your WooCommerce store conversions.

And, the magic is Lightbox popups!

Lightboxes allows you to easily grab the attention of your visitor and to lead them into sales, especially when your prospect is about to the website.

Thinking how?

The Lightbox popups can be a coupon code, latest offer, to promote a special product to collect their contact information such as name, email address etc. which can be used for retargeting and email marketing campaigns.

Imagine you are going to make an order for a product, but going to leave the store maybe because thought purchasing the product later or price concerns, and when you move you were about to close the website, a cool popup appears which just asks your email address to send your exclusive 10% offer coupon code.

How exciting it is? You might request the coupon code by entering your email address and soon end up with purchasing the product.

I hear you– Thinking about the developer effort and other factors while creating this technology?

The good news is you don’t need to reinvent the wheel again or even doesn’t need to use your developer resource to make these kinds of popups.

Let us show you how easy it is to create conversion boosting popups inside your WooCommerce without writing a single line of code.

You heard it right, and also you can connect these popups with your favourite CRM or email marketing tools such as ActiveCampaign, Keap, etc.

Alright, so let us show you how to create you first WooCommerce popup.

How to Create Exit Popups in WooCommerce

First, we need to have an active on OptinMonster account and it should be connected to your WordPress. You can create your OptinMonster account here.

Once you created your OptinMonster account, you need to connect it with your WordPress. It’s pretty simple. Just install & active the OptinMonster plugin on your WordPress and then click on connect your account button.

Connect OptinMonster Account

Once the OptinMonster plugin is activated, you can just follow the on-screen instructions to create your WooCommerce popup without writing a single line code.

Filed Under: Wordpress

[Step-by-Step] Create Multi-Page Forms in WordPress

August 23, 2020 by Technology Blog Leave a Comment

In this article, we’ll guide you to create your first multi-page form in your WordPress blog or website without writing a single line of code.

What is a Multi-Page Forms?

It’s just breaking your long forms into multiple pages/ steps so that users will be seeing only a few simple questions so that the conversion can be improved. And the beautiful benefit or multi-pages forms is, you can use conditional logics to show different questions based on their previous answers.

Excited? Let’s see how we can create your first multi-step WordPress form

How to Create Multi-Step WordPress Form

Video Guide

Step-by-Step Guide

Step 1: Create your form in WordPress

The first step is to create your WordPress form using a form builder. We need to choose a builder which supports multi-page feature for this step.

In this example, we’re using a WordPress form builder- WPForms which is the best WordPress form builder in market.

So, let’s install and activate WPForm builder.

Next, go to WPForms » Add New in your WordPress dashboard to create a new form.

Name the form on setup screen and choose a template. Here we’re choosing a simple template.

you can start building your form by choosing a template and adding additional questions (we’ll convert this long form into multi-step form later) in fields section.

Needs to accept payments on your WordPress form? Learn more.

Step 2: Split Your Form into Multi-Steps

Once your form is ready with fields, you need to add the Page Break form field to where you need to split your form.

To do this, you can just drag the Page Break form field in Fancy Fields section and drop to in between your form (see the image below).

Repeat this step to split your form as much as you need. WPForms will write the complex codes on behalf of you to make the multi-pages form functional.

Step 3: Customize the Progress Bar on Your WordPress Form

It is recommended to add a progress bar as well on your forms to let your prospects know different sections of your form.

Using a process bar, they’ll know where they are on your WordPress form and how much they have to fill to complete form– This is important for improving conversion rate. To make this super easy for you, WPForms has built-in breadcrumb bars as below:

You can easily customize progress bars and page titles by simply clicking on each page break fields.

You’ll see be below customization options:

Then click on the ‘Next‘ button, and you can customize the button and title of next page.

On this page, you can click on the ‘Previous‘ button and customize it as well.

Click Save once your complete customizing all your pages and buttons.

Step 4: Configure Form Settings

Now you’ve design of the form with multi-step feature enabled. The next is to configure your form settings to customize it’s behaviour and submission actions.

Go to Settings -> General

On this screen, you can configure the following:

  • Form Name — Change the name of your form to identify later
  • Form Description — Give your form a description
  • Submit Button Text — Customize the copy on the submit button- Studies says that the conversion will be improved if you use action verbs on your button
  • Spam Prevention — This section helps you to enable anti-spam protections to stop bots auto submitting on your form. You can also refer how to enable Google reCAPTCHA on your form here
  • AJAX Forms — Enable AJAX settings with no page reload for improving page load speed
  • GDPR Enhancements — You can disable the storing of entry information and user details, such as IP addresses and user agents. This is mandatory in EU countries

Click ‘Save‘ once you’re done!

Step 5: Configure Your Form’s Notifications

You can setup an email notification when someone submit the form.

Go to Settings -> Notifications.

Step 6: Customize Your Form’s Confirmations

On settings -> Customizations section, you can update the POST form submission confirmation action. There’re three type of confirmations are supported by WPForms:

  • Message: This is the default confirmation type. A simple confirmation message will appear instead of field letting them know their submission is sent successfully. This confirmation type won’t redirect from your current page.
  • Show Page: This confirmation type will show a specific page on your WordPress once the submission is successful. This type is recommended if you are planning to WordPress page itself as thank you page
  • Go to URL (Redirect): Use this type if you want to redirect prospect another website after submitting the form

Step 7: Add Your Form to Your Website

Awesome!

Now your multi-step form is ready to embed on pages as per your requirements.

On the edit window of pages you can see ‘Add WPForm icon’.

Just click on it and choose the form you would like to add on that page.

Conclusion

That’s it! You’re created your multi-step form successfully.

What’s next? Let’s learn how to integrate your WPForms with your email autoresponded tool such as ActiveCampaign or MailChimp.

Filed Under: Wordpress

How to Easily Boost Your Email List with Content Locking

August 19, 2020 by Technology Blog Leave a Comment

Do you want to add content locking on your blog or website? Content locking is one of the most powerful and proven email list building tactics to skyrocket your lead generation.

In this article, we’ll help you to create content locking on your website without writing a single line of code. Yes, you heard right.

What is Content Locking?

Content locking is an email list building tactic used by marketers to skyrocket email lists without compromising the quality of leads. It forces the reader to do an action (generally opt-in form submission) for getting access to protected content.

As you can see on the image above, the ‘list of events’ is blurred behind the signup box. Once the reader put their details the opt-in box will disappear and they can read the content clearly.

It is recommended to lock only high-value content like a list of hacks, eBook download link or access to a FREE course. In the example above, the website owner put the content lock inside an article which hide the download link of ‘events list’.

Got it?

Awesome! Now you understood what is content lock and how to use it strategically. If you have any questions, just comment below and one of our experts will help you with more details.

What you do need to setup content locking in WordPress?

In this tutorial, we’ll be using a powerful tool OptinMonster to create content locks on your website.

OptinMonster also provides a lot of other lead generation widgets as well that can be used on your website with integration to your CRM platforms without writing a single line of code.

Video tutorial

How to setup Content Locking?

First thing first:

  • Create an account in OptinMonster
  • Choose one of the templates
  • Customize the widget to match your brand guidelines
  • In the settings, enable the option ‘Lock Content Below Campaign?’
  • You can use this widget on your website directly. OptinMonster support almost all the CMS platforms including WordPress
  • You can also connect the opt-in form with your email marketing tool such as ActiveCampaign

That’s. You’re done! Start skyrocketing your email list.

Filed Under: Wordpress

How to Create Online Donation Forms for Nonprofits

May 31, 2020 by Technology Blog Leave a Comment

Creating non-profit donation forms in WordPress is easier than ever.

In this article, we’ll show you how to create online donation forms through simple and easy steps.

Step 1: Creating Your WordPress Form

The first thing to do is to install and activate the WPForms plugin. WPForms is a freemium plugins which helps you to create beautiful WordPress forms in minutes with writing a single line of code.

Once this is done, next go to WPForms and Add New to create a new form.

Here, name your first form and choose the donation form template.

The default donation form will appear.

Step 2: WPForm Customization

The default fields like name, email, donation amount, and message will be present on the template.

Additional fields can be chosen from the list on the left-hand side and can be dragged to the form to place it there.

Once you are done editing the form, click on the Save button on the top right to save the changes made.

Step 3: Configuring the Form’s General Settings

We’ve to configure certain settings while creating a non-profit WPForm. 

We are beginning with the general settings.

Go to the Settings and then General.

You can customize many things here like your form’s name, form description and even the submit button text.

Step 4: Configure the Form’s Notifications and Confirmations

You will be notified about the donations made unless you turn off this feature.

The site visitors will be delivered a message once they submit a donation form on your website.

You can choose from the three donation confirmations which will let the visitor know about the next steps – Message, Show Page, and Go to URL.

Step 5: Setting up the Payment Method

Configuring the payment settings is mandatory to receive donations through WPForms.

WPForms can be integrated with both PayPal or Stripe to receive payments.

Install and activate the addon for the payment platform that your wish to integrate with the WPForms.

Once this is done, choose the payment tab in the form editor.

In this example, we’re choosing PayPal as our payment platform.

Additional settings will appear.

Once you’ve made the edits and added the details, click Save.

Step 6: Adding the non-profit form to the Website

Choose the page from WordPress on which you’d like to insert the donation form and click on Add Form.

There!

Your non-profit donation forms will appear on the website immediately.

Filed Under: Wordpress

How to Boost Your Conversions using Exit-Intent

May 12, 2020 by Technology Blog Leave a Comment

The truth is, 70% of your website/ blog visitors will leave you without literally doing anything on your website.

And, I know how hard you worked to drive your visitors to your website, whether it is SEO, social media, or paid channels.

I heard from you!

So in this article, I’m introducing you to an advanced tactic- Exit popup implementation.

We use an online tool called OptinMonster for this implementing exit-intent popups.

Use this coupon code ‘KID‘ for 30% off on your purchase! A portion of your money will be donated to No Kids Hungry charity.

How does It work?

The exit-intent feature will retain your visitor on your website by providing them with engaging content.

When a user is scrolling up your website to find the address bar it is an indication that he/she is not interested in the content anymore.

This is when the low or medium sensitivity comes into action.

The exit-intent gives a message with great content.

Let’s look up a different scenario.

What if the user just clicks the back button instead of scrolling up.

Here, exit-intent sensitivity is high.

So you should choose the sensitivity as High.

The pop-up will show offers or discounts which the user might find interesting and make them want to remain on your site for even longer.

With the help of exit-intent and proper content, you can boost your conversions and bring up your sales.

OptinMonster also has unique templates for the pop-up messages which are to appear upon triggering the action.

This is an example of the template ‘Donate’.

There are different templates available in catching designs to increase customer retention rates and the number of leads.

What is more?

The templates are also customizable.

You can edit the content and add the content you wish that your users should see before leaving your website forever.

With the exit-intent feature from OptinMonster, boost your sales and increase your lead 2-4%.

Filed Under: Wordpress

How to Collect PayPal Payments on Your WordPress Site

May 1, 2020 by Technology Blog Leave a Comment

Now you can collect PayPal payments through your WordPress website forms.

WPForms will allow you to accept payments by integrating PayPal into it.

Let’s see how to get it done in simple and easy steps.

Step 1: Installing PayPal Addon and Form Creation

Install and activate WPForms as well as PayPal addon s on to your WordPress website.

Once this is done, we’re going to add PayPal in your WPForms.

For this, first, you have to create a form.

In this example, we are creating a billing/order form.

The form appears with the default fields.

PayPal needs only a single field to work properly with WPForms.

Step 2: Add PayPal to the Form

Now let’s connect PayPal to your form.

Go to the Payments section and then PayPal Standard.

Check the ‘Enable PayPal Standard payments’ box.

You can fill in the remaining boxes and once you are ready, click on the ‘Save’ button to save the payment details.

Step 3: Set Up Conditional Logic

The conditional logic is a smart Form which changes the options on your forms based on the user’s selection.

To begin with, open the form builder, go to payments and then PayPal standard.

Tick the box labelled ‘Enable Conditional Logic’.

Now a set fo additional boxes will appear and you can decide when the user should be sent to PayPal to complete the payment process by filling in the details.

For example, you only need to send users to the Paypal only if they are willing to signup for the workshop.

For this, you will have to add a drop-down asking whether they would like to signup and allow them to choose from the options.

The users will only be taken to Paypal only if they would like to sign up for the workshop. 

This way you can condition your WPForm.

Step 4: Test your Form

You can test your WPForm by running a test entry by pretending to be a user.

Going all the way till the PayPal option and carrying out a small transaction is also highly recommended to ensure everything is working well.

Filed Under: Wordpress

Enable Upload Files on Your WordPress Form

March 13, 2020 by Technology Blog Leave a Comment

Now you can upload files to your website as easy as ever. 

WPForms have introduced a new plugin that allows you to add file upload fields to your forms.

With this addition, the visitors can now easily upload their files.

This also considerably reduced form abandonment rates.

Let’s see how it’s done step by step.

Step 1: Create your file upload form

Install and activate WPForms plugin on your website.

Choose WPForms and then Add New from your WordPress website dashboard.

Create a form and name it.

From the additional templates option below, you’ll have to choose and open the file upload form.

Ensure that you’ve activated Form Templates Pack Addon to see the file upload form in the options.

A drag and drop builder which is pre-built will be displayed.

The form will have the name, email and phone number fields by default.

To add fields of your choice, you can drag them from the left to the form.

Now, drag and drop file upload filed which will be under the fancy fields to your form.

You can even customize the field by clicking on it.

Label, description and style can be edited here.

Step 2: Add the File Upload Form to your WordPress Site

With the new plugin, you can add file upload forms anywhere on your website.

Go the update settings of the page you wish to add the file upload form on your website.

Choose the first icon below the page title.

Now click on Add WPForms icon.

WPForms widget will appear.

Choose your file upload form from the drop-down.

Update the page and your form will be published on the desired page.

Filed Under: Uncategorized

How to Build Spam-Free WordPress Contact Forms

January 24, 2020 by Technology Blog Leave a Comment

Wishing so hard that the spams don’t exist? 

Wondering how easy things would have been without those sneaky uninvited spam in your WordPress contact forms? 

Behold! WordPress listens to how its users think!

And what’s more, now you can build spam-free WPForms.

The steps are so easy that even a beginner can do it by following the guidelines. 

WordPress forms offer such a delight by enhancing the quality of your lead generation strategy by eliminating the risk of spam. 

How to Build a Spam-Free Contact Form Without CAPTCHA

The steps to creating a spam-free contact form without CAPTCHA is explained for uninterrupted user experience.

Entering the CAPTCHA might not be easy for every user. 

So the chances of form abandonment are at a higher rate. 

WPForms came up with a solution to this dilemma. 

Now you can add an invisible reCAPTCHA to your contact forms that doesn’t hinder the flow of submission.

Step 1: Create a Contact Form

Once you install and activate WPForms plugin, create a WordPress contact form. 

You can determine whether you need a simple contact form or a multi-step form based on your discretion. 

Step 2: Configure reCAPTCHA Settings

To configure your reCAPTCHA, you need to go WPForms > settings and then click on the reCAPTCHA tab. 

Below the reCAPTCHA tab, you will find two options – Checkbox reCAPTCHA v2 and Invisible reCAPTCHA v2.

Choose Invisible reCAPTCHA from the both.

You can create a reCAPTCHA for free from Google. It requires a site key and a secret key. 

To generate the keys, visit Google’s reCAPTCHA setup page. 

You will see an admin console button on the top right corner of the website. Click on that. 

Sign in to the admin console using your Google account and you will be redirected to a different page.

In this page, you can register your website for reCAPTCHA.

You will see a different screen if you have registered some other account for reCAPTCHA. To add a new website, just click on the plus sign. 

Enter your website in the label field.

Next, choose the reCAPTCHA type you wish to add to your website. 

Here, we have chosen invisible reCAPTCHA badge.

Once this is done, enter your website domain in the space provided. 

After entering a valid email address and accepting the reCAPTCHA terms and conditions, you can now click on the submit button to save your website. 

In the next page, you will see your website’s site key and secret key. 

Now you copy both the site key and secret key.

Reopen your WPForms settings page.

Ensure that the invisible reCAPTCHA v2 is chosen as type.

You will see space to enter site key and secret key.

Paste the copied keys in the provided space.

Once this is done, click on save settings to save the changes made. 

Step 3: Enable Invisible reCAPTCHA in your Contact Form

To enable invisible reCAPTCHA on you contact forms, go to settings and then editor in your form editor. 

After scrolling down, click on the ‘Enable Google invisible v2 reCAPTCHA’.

Click save.

You’ve successfully enabled invisible reCAPTCHA on your contact forms. 

Now Google will automatically detect if any spambots try to make a fake submission. 

Yet another method to automatically detect spam is by clicking on ‘Enable anti-spam honeypot’ from settings > general.

Honeypot detects the hidden field that a spambot fills in while making a submission.

This feature will automatically reject spambots after detecting the same. 

That’s it!

Filed Under: Uncategorized

  • « Go to Previous Page
  • Page 1
  • Page 2
  • Page 3
  • Page 4
  • Interim pages omitted …
  • Page 13
  • Go to Next Page »

Primary Sidebar

Copyright © 2025 TechieFeeds.com